Series Engine Tutorials
Installing the Plugin
Series Engine is incredibly easy to install, and if you've ever installed another WordPress plugin before, you know exactly what to do.
To get started, purchase a Series Engine license and download the ZIP file from the link in your purchase email.
Uploading the Series Engine Plugin
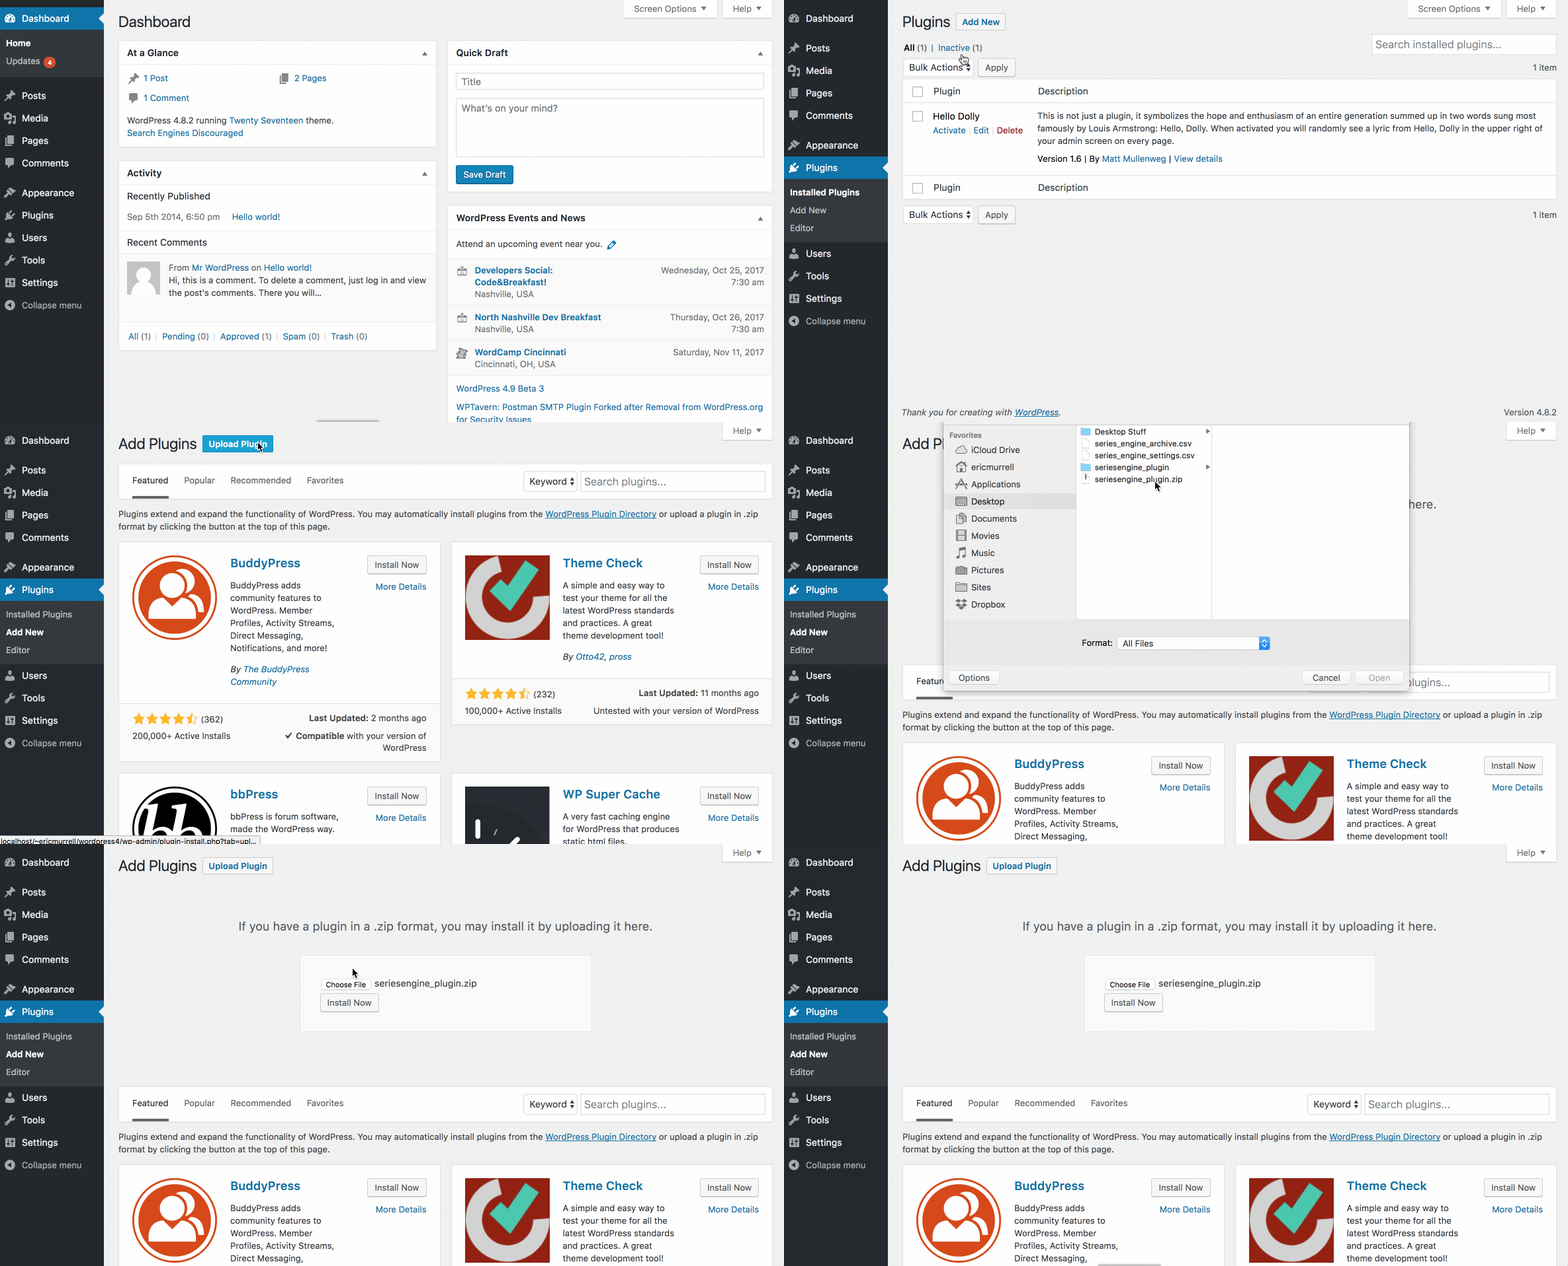
The first step is to upload the ZIP file mentioned above to the WordPress site where you're going to use the plugin.
Log in to your WordPress dashboard and navigate to "Plugins > Add New > Upload Plugin." Upload the "seriesengine_plugin.zip" file using the provided upload box, and then proceed to the next step when you see the success message.
If you're comfortable using an FTP client, you can also navigate to your WordPress site's 'plugins' directory and upload the unzipped 'seriesengine_plugin' folder from the ZIP file mentioned above.

Activating the Series Engine Plugin
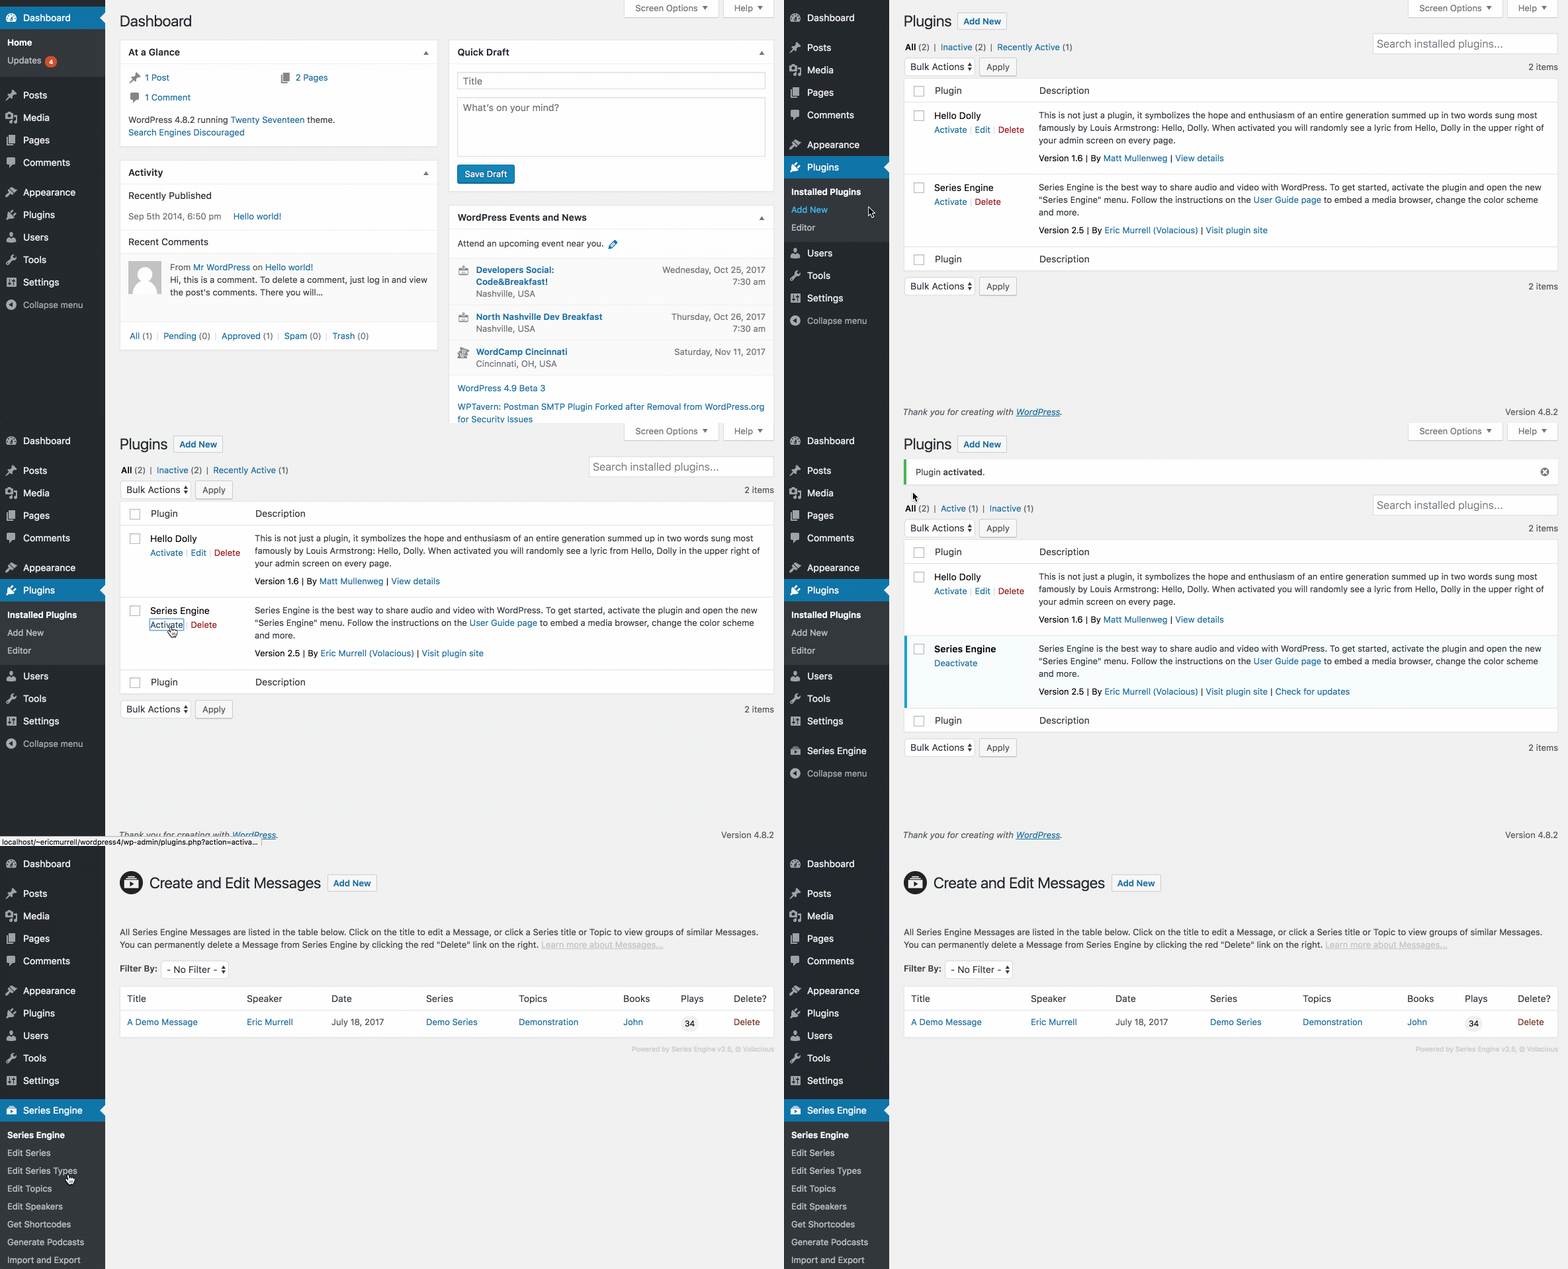
Once the plugin has been uploaded to your site, activating the plugin is easy.
Navigate to "Plugins > Installed Plugins," locate Series Engine, and click the "Activate" link. Once you see the success message at the top of the screen, you're ready to begin using Series Engine on your site.
Click on the new Series Engine menu in your WordPress dashboard to begin adding content, or move to the next step to display Series Engine content publicly with the basic shortcode on any page of your site.

Starting with the Basic Shortcode
If you're looking to get started quick, select and edit a Page where you want to display your Series Engine media browser, and simply enter the [seriesengine] shortcode in the Page's content. Save your changes and view the Page in a browser window to see your first Series Engine embed in action!
Series Engine provides dozens of options for displaying your content using its powerful Custom Shortcode Generator. Click here to learn more.
